Fedora 10 下 OpenVPN 搭建
Table of Contents
- 服务器环境:Fedora 10
- 客户端环境:Windows XP SP2
- OpenVPN 版本:2.1
注意:我的操作都是在 Windows 里 telnet 到 Linux 机器进行操作的:)
1. 什么是 VPN
VPN 英文全称 Virtual Private Network,中文意思即虚拟专用网络。使用 VPN 可以将位于 Internet 上不同地方的主机之间建立一个安全的通讯线路,利用公共网络建立虚拟私有网。
2. 软件包安装
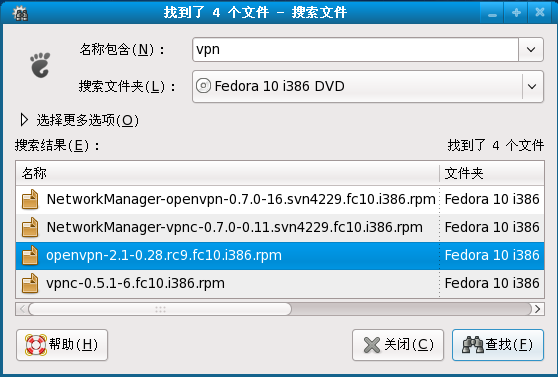
需要安装 openvpn-2.1-0.28.rc9.fc10.rpm,可以通过搜索光盘或者镜像文件来得到此包。如果没有光盘或者镜像文件,可以通过 ftp://rpmfind.net/Linux/fedora/releases/10/Everything/i386/os/Packages/openvpn-2.1-0.28.rc9.fc10.i386.rpm 下载
3. 包安装
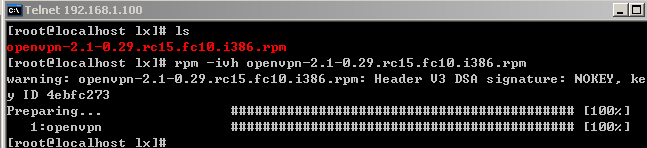
执行命令:
# rpm -ivh openvpn-2.1-0.29.rc15.fc10.i386.rpm
如图:
4. 证书生成
1.复制证书工具包,并建立证书目录:
# cp -r /usr/share/openvpn/easy-rsa /etc/openvpn/
# mkdir /etc/openvpn/easy-rsa/1.0/keys
2.修改 ars 文件
# vi /etc/openvpn/easy-rsa/1.0/vars
并按下“I”键进行编辑。
修改以下内容:
export KEY_COUNTRY=CN
export KEY_PROVINCE=CD
export KEY_CITY=CHENGDU
export KEY_ORG="0xx"
export [email protected]
修改完毕后按下 Esc 键,再按下“:”后输入 wq 保存。
3.初始化变量库并清空证书库
# . ./vars
# ./clean-all
注意“../vars”中间有两个小点,点和点之间有个空格。

4.证书验证机制
# ./build-ca
然后填入相应信息

之后,keys 目录就生成了两个文件,分别是 ca.crt 和 ca.key。
5.服务器证书文件
# ./build-key-server server


[root@localhost 1.0]# ./build-key-server server

Generating a 1024 bit RSA private key

..++++++

..........++++++

writing new private key to 'server.key'

-----

You are about to be asked to enter information that will be incorporated

into your certificate request.

What you are about to enter is what is called a Distinguished Name or a DN.

There are quite a few fields but you can leave some blank

For some fields there will be a default value,

If you enter '.', the field will be left blank.

-----

Country Name (2 letter code) [cn]:cn
State or Province Name (full name) [cd]:cd
Locality Name (eg, city) [chengdu]:chengdu
Organization Name (eg, company) [0xx]:0xx
Organizational Unit Name (eg, section) []:lx
Common Name (eg, your name or your server's hostname) []:lx
Email Address [[email protected]]:[email protected]

Please enter the following 'extra' attributes
to be sent with your certificate request
A challenge password []:123456
An optional company name []:123456
Using configuration from /etc/openvpn/easy-rsa/1.0/openssl.cnf
Check that the request matches the signature
Signature ok
The Subject's Distinguished Name is as follows
countryName           :PRINTABLE:'cn'
stateOrProvinceName   :PRINTABLE:'cd'
localityName          :PRINTABLE:'chengdu'
organizationName      :PRINTABLE:'0xx'
organizationalUnitName:PRINTABLE:'lx'
commonName            :PRINTABLE:'lx'
emailAddress          :IA5STRING:'[email protected]'
Certificate is to be certified until Mar 26 17:24:35 2019 GMT (3650 days)
Sign the certificate? [y/n]:y
1 out of 1 certificate requests certified, commit? [y/n]y
Write out database with 1 new entries
Data Base Updated
执行完毕后,keys 目录下生成了 server.crt、server.csr 和 server.key 三个文件。
5. 客户端证书
在同一时间里,每个证书只能给一个客户端连接,如果需要更多,则重复步骤多建立。
# ./build-key client

[root@localhost 1.0]# ./build-key client
Generating a 1024 bit RSA private key
.............++++++
..........++++++
writing new private key to 'client.key'
-----
You are about to be asked to enter information that will be incorporated
into your certificate request.
What you are about to enter is what is called a Distinguished Name or a DN.
There are quite a few fields but you can leave some blank
For some fields there will be a default value,
If you enter '.', the field will be left blank.
-----
Country Name (2 letter code) [cn]:cn
State or Province Name (full name) [cd]:cd
Locality Name (eg, city) [chengdu]:chengdu
Organization Name (eg, company) [0xx]:0xx
Organizational Unit Name (eg, section) []:lx
Common Name (eg, your name or your server's hostname) []:lx
Email Address [[email protected]]:[email protected]
Please enter the following 'extra' attributes
to be sent with your certificate request
A challenge password []:123456
An optional company name []:123456
Using configuration from /etc/openvpn/easy-rsa/1.0/openssl.cnf
Check that the request matches the signature
Signature ok

The Subject's Distinguished Name is as follows
countryName           :PRINTABLE:'cn'
stateOrProvinceName   :PRINTABLE:'cd'
localityName          :PRINTABLE:'chengdu'
organizationName      :PRINTABLE:'0xx'
organizationalUnitName:PRINTABLE:'lx'
commonName            :PRINTABLE:'lx'
emailAddress          :IA5STRING:'[email protected]'
Certificate is to be certified until Mar 26 17:28:24 2019 GMT (3650 days)
Sign the certificate? [y/n]:y

1 out of 1 certificate requests certified, commit? [y/n]y
Write out database with 1 new entries
Data Base Updated
6. 对证书进行编译
# ./build-dh

7. 服务端配置
首先拷贝证书文件到 /etc/openvpn 目录
# cp /etc/openvpn/easy-rsa/1.0/keys/ca.crt /etc/openvpn/
# cp /etc/openvpn/easy-rsa/1.0/keys/dh1024.pem /etc/openvpn/
# cp /etc/openvpn/easy-rsa/1.0/keys/server.crt /etc/openvpn
# cp /etc/openvpn/easy-rsa/1.0/keys/server.key /etc/openvpn/
然后拷贝配置文件到 /etc/openvpn
# cp /usr/share/doc/openvpn-2.1/sample-config-files/server. conf /etc/openvpn/
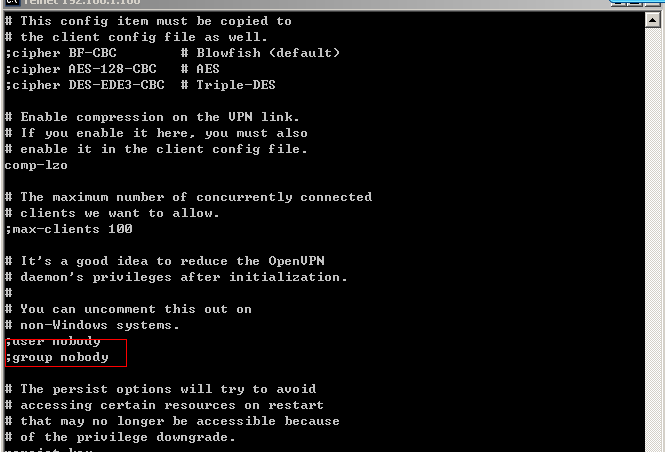
编辑配置文件,找到以下两行,将前面的“;”去除:
;user nobody
;group nobody
再启动服务
# /etc/rc.d/init.d/openvpn start

如果需要运行 Linux 后自动启动 OpenVPN 服务,直接输入 ntsysv,找到 OpenVPN,按下空格将前面的星号打上,保存即可。
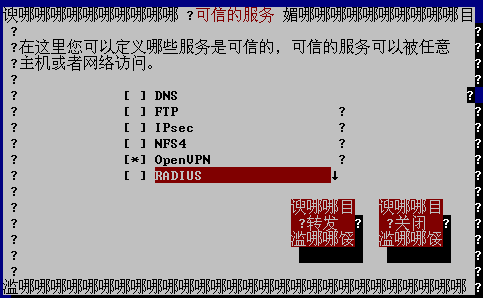
然后设置防火墙。
# setup
选择“防火墙配置”-“定置”,勾选 OpenVPN 后保存退出。
8. 客户端设置
最后在 XP 下进行设置。下载 openvpn-2.0.9-gui-1.0.3-install.exe,一步步安装完成后,进入 C:\Program Files\OpenVPN\config(默认路径),建立一个名为“client.ovpn”的文件,并编辑内容,如下:
client
dev tap
;dev tun
;dev-node MyTap
;proto tcp
proto udp
remote 这里是 Linux 的 IP 地址 1194
;remote-random
resolv-retry infinite
nobind
user nobody
group nobody
route 192.168.1.0 255.255.252.0
persist-key
persist-tun
;http-proxy-retry # retry on connection failures
;http-proxy [proxy server] [proxy port #]
#注意下面三个文件要对应
ca ca.crt
cert client1.crt
key client1.key
comp-lzo
# Set log file verbosity.
verb 4
然后将 Fedora 目录 /etc/openvpn/easy-rsa/1.0/keys 中的 ca.crt、client.crt 和 client.key 三个文件拷贝到 XP 中 C:\Program Files\OpenVPN\config(默认路径) 目录中,可以通过 U 盘、FTP 等方式拷贝过来,我直接用 FTP 拷贝的。
然后展开开始菜单,运行 OpenVPN GUI
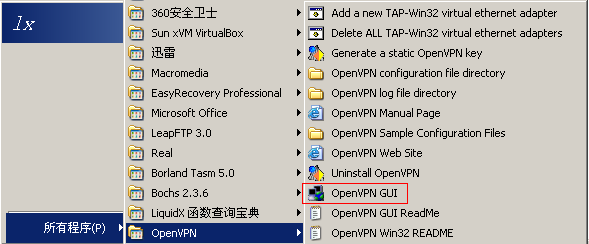
此时任务栏下的图标为红色

点击右键,选择 Connect

成功后,为绿色

一个 VPN 就搭建完毕了,欢迎讨论不足之处:)